AWS Quick Start Guide
Supported platforms:
This guide will walk you through deploying Gremlin to your AWS environment, identifying services, and running the AWS Test Suite. This guide is also available as an interactive demo.
Overview
Gremlin RM lets you run comprehensive reliability tests on services running in your environment. It tests several key reliability behaviors of each service, such as its scalability, redundancy, and ability to tolerate failed or slow dependencies. Gremlin then assigns a reliability score to the service based on the outcome of these tests.
For AWS users, we provide a streamlined onboarding process. Once you deploy the Gremlin agent to your Amazon EC2 or EKS instances, Gremlin automatically detects the services running on those instances using your Elastic Load Balancer (ELB) traffic. We then define those services in the Gremlin web app and generate a suite of ready-to-run reliability tests. We also give you the option to automatically create Health Checks based on each service’s key metrics. Once the services are created and Health Checks are added, you can start running reliability tests on your services.
This guide will walk you through the following steps:
- Deploying Gremlin to your AWS environment.
- Selecting the Elastic Load Balancers (ELBs) to use to identify services.
- Adding AWS Health Checks to your services.
Prerequisites
Before starting this guide, you should deploy the Gremlin agent to your AWS environment.
- If you’re using Amazon Elastic Kubernetes Service (EKS), follow the instructions in our Helm guide.
- If you’re using Amazon Elastic Compute Cloud (EC2), follow the instructions in our Linux or Windows installation guides.
- If you’re using Amazon Elastic Container Service (ECS), follow our standalone container guide.
Step 1: Authenticate with your AWS account
Before Gremlin can detect and add your services, you first need to grant Gremlin access to resources in your AWS account. This will allow Gremlin to:
- View CloudWatch metrics for use in Health Checks.
- View Route53 routes, traffic policies, health checks, and other resources.
- View Elastic Load Balancer (ELB) instances, target groups, policies, and attributes for service identification and mapping.
There are two ways to authenticate Gremlin: Using an IAM role (recommended), or using a service account.
Authenticating using an IAM role
Authenticating using an IAM role is the recommended method, as it gives you finer control over which resources and permissions Gremlin can access, and without having to share your AWS credentials. Follow the instructions in the Amazon Cloudwatch Health Check documentation to authenticate using IAM. After you’ve clicked Save, return to this guide.
Authenticating using a service account
Authenticating using a service account doesn’t give you as much control as an IAM role, but may be the preferred method for teams that aren’t fully migrated to IAM. Note that you’ll need to provide Gremlin with credentials for it to use the account. Follow the instructions in the Amazon Cloudwatch Health Check documentation to authenticate using a service account. After you’ve clicked Save, return to this guide.
Step 2: Select your Elastic Load Balancer(s)
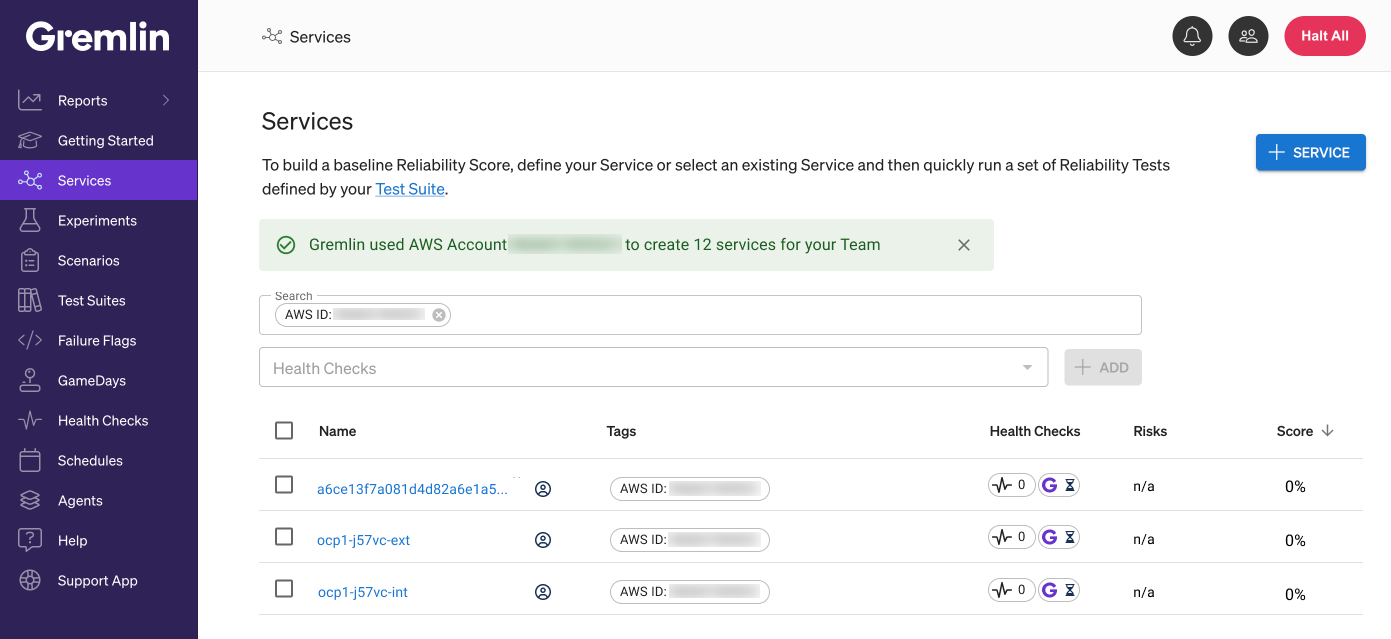
After successfully authenticating, Gremlin displays a list of all Elastic Load Balancers (ELBs) it detected in your AWS environment. Specifically, it shows ELBs that are connected to a service with a Gremlin agent present. For example, if you installed Gremlin onto an EKS cluster and have one or more ELBs directing traffic to that cluster, then that ELB will appear in the list.
To select one or more ELBs, click on the checkboxes next to its name. You can use the search box to filter the list by name, region, or by tag. You can also select multiple ELBs, or select all ELBs by using the checkbox at the top of the list. When you’ve selected all the ELBs you want to use, click Create Services. Gremlin will use the endpoints identified from the ELB to define your services and generate a suite of ready-to-run reliability tests.
Step 3: Add Health Checks
Before you can start running reliability tests on a service, you’ll need to add at least one Health Chec. A Health Check is an automated process that checks the state of the service before, during, and after a test. Health Checks ensure that your services are still operating within expectations, but they also serve a second purpose: safety. If your systems become unresponsive, unhealthy, or unstable, the Health Check will automatically stop the actively running test and return your service to its normal operation.
With AWS integration, there are two ways to create Health Checks:
- Letting Gremlin automatically create Health Checks for you (recommended).
- Manually adding Health Checks.
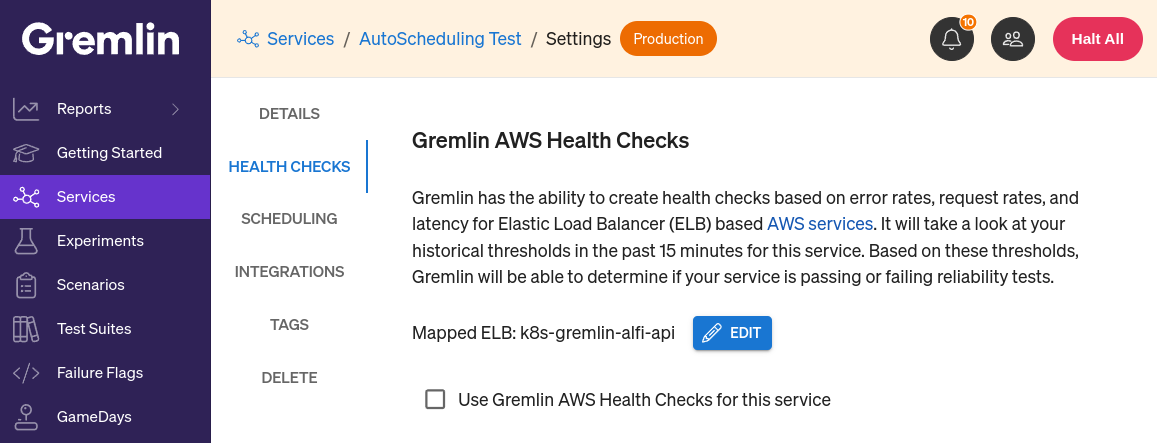
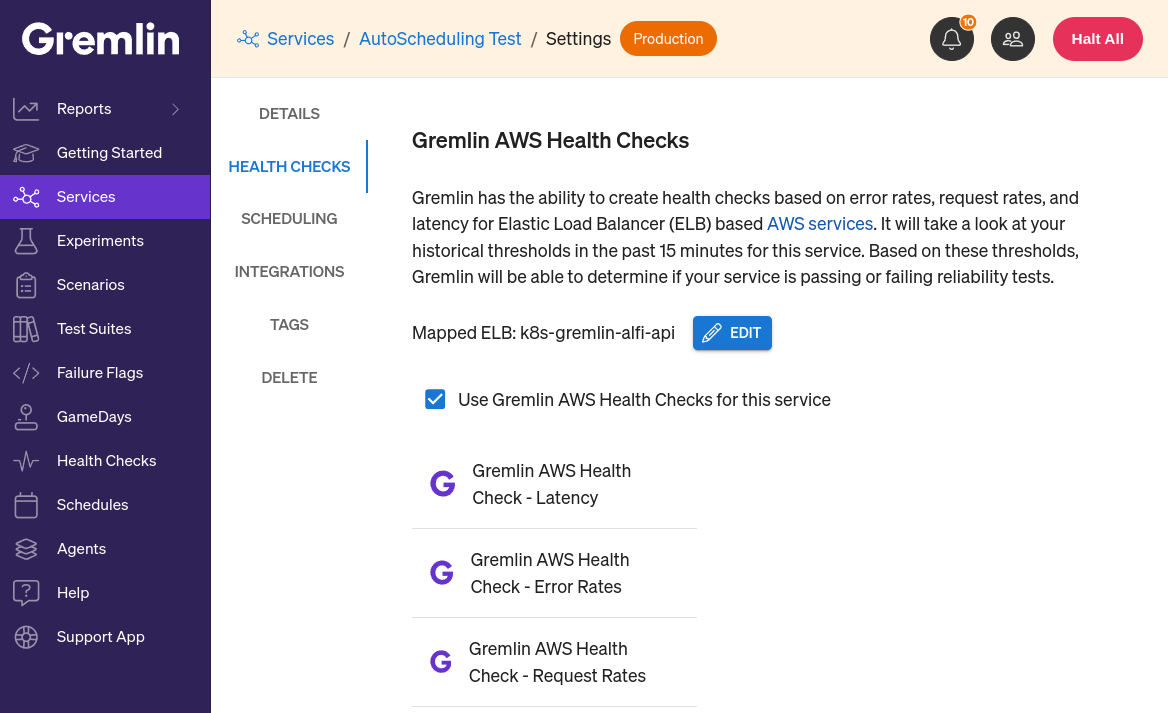
Automatically adding Intelligent Health Checks
Gremlin can use AWS CloudWatch metrics to automatically create Health Checks for you. These Intelligent Health Checks will track the service’s latency, error rates, and request rates.
To use Gremlin-created Intelligent Health Checks:
- Navigate to an AWS service from the service list.
- Click Settings, then click Health Checks.
- Under Gremlin Intelligent Health Checks, check the box next to “Use Gremlin Intelligent Health Checks for this service”. Gremlin will immediately create and configure the Health Checks and use them during reliability tests run on this service.
To remove these Health Checks, simply uncheck the box and confirm their removal. This will have no impact on your reliability test scores, though it will prevent you from running reliability tests unless you’ve added another Health Check to the service.
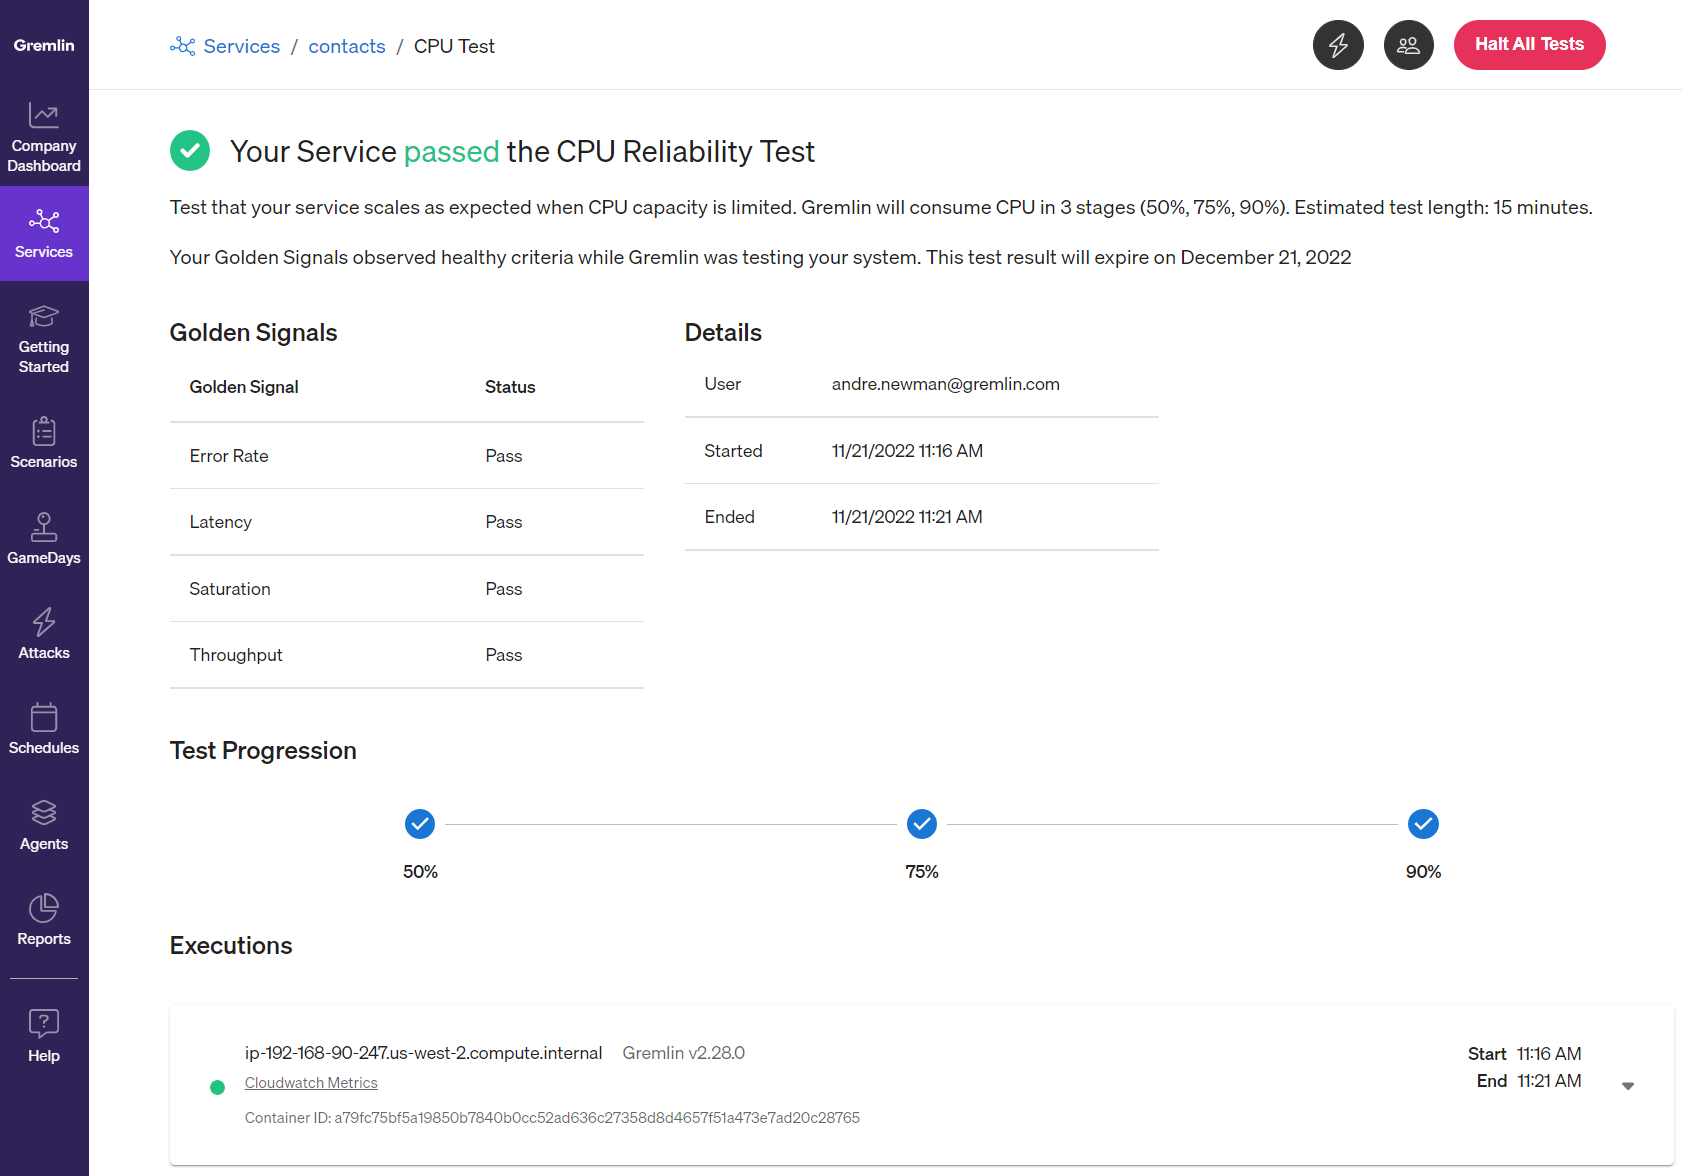
Step 4: Start testing
Now you're ready to run your reliability tests! Return to your service list, click on the service you want to test, find the test you want to run, and click the Run button. Alternatively, you can click the Run All button at the top of the page to run each test in sequence. Gremlin will run the tests, use your Health Checks to monitor your service, and record the results automatically. You'll also see your reliability score increase as a reward for running your first test. Great job!