How to run multiple experiments in parallel using Gremlin

Introduction
Gremlin lets you run multiple Chaos Engineering experiments in a single workflow called a Scenario. Normally these experiments run sequentially, but Gremlin also lets you run experiments in parallel. In this tutorial, we'll show you how to create a Scenario that runs two different experiments simultaneously. We'll show you how to create your own custom Scenario, how to set up branching, and what to consider when creating branched Scenarios.
Overview
This tutorial will show you how to:
- Create a new Scenario using an existing Scenario as a template.
- Use the branching mechanism to create two parallel experiment paths in a Scenario.
- Use Health Checks to monitor the health of your systems during the Scenario.
Prerequisites
Before starting this tutorial, you’ll need the following:
- A Gremlin account (log into an existing account or sign up for a free 30-day trial)
- A host, container, or service with the Gremlin agent installed. See our documentation for instructions on setting up the Gremlin agent.
Step 1 - Clone a Recommended Scenario
In this step, you’ll create a new Scenario by cloning an existing Recommended Scenario. A Recommended Scenario is a pre-built Scenario created by the Gremlin team to test for common use cases like scalability, redundancy, and recoverability. You can run a Recommended Scenario as-is, but in this case, we'll use one as a springboard.
- Log into the Gremlin web app.
- Click on this link to open Recommended Scenarios. Alternatively, click on Scenarios in the left-hand navigation menu, then click on the Recommended tab.
- Look for the Scalability: CPU Scenario. You can browse the list, use the search box, or simply click on this link. This Scenario runs a series of three CPU tests with increasing usage. First it uses 50% CPU, then 75%, then 90%. We'll edit this Scenario by adding a memory test alongside each CPU test.
- Click Customize to start editing the Scenario.
Step 2 - Customize your new Scenario
In this step, we'll edit our new Scenario by adding a branch and another experiment. A branch is a series of nodes that runs sequentially. They can run simultaneously alongside other branches and can even contain nested branches.
Step 3 - Add a memory experiment
Now that we have our new branch, let's add a memory experiment.
Step 4 - Run the Scenario
Now, we get to run our Scenario. After you saved your Scenario, you'll see a button labeled Run Scenario. Click on it, then click Run Scenario again to confirm.
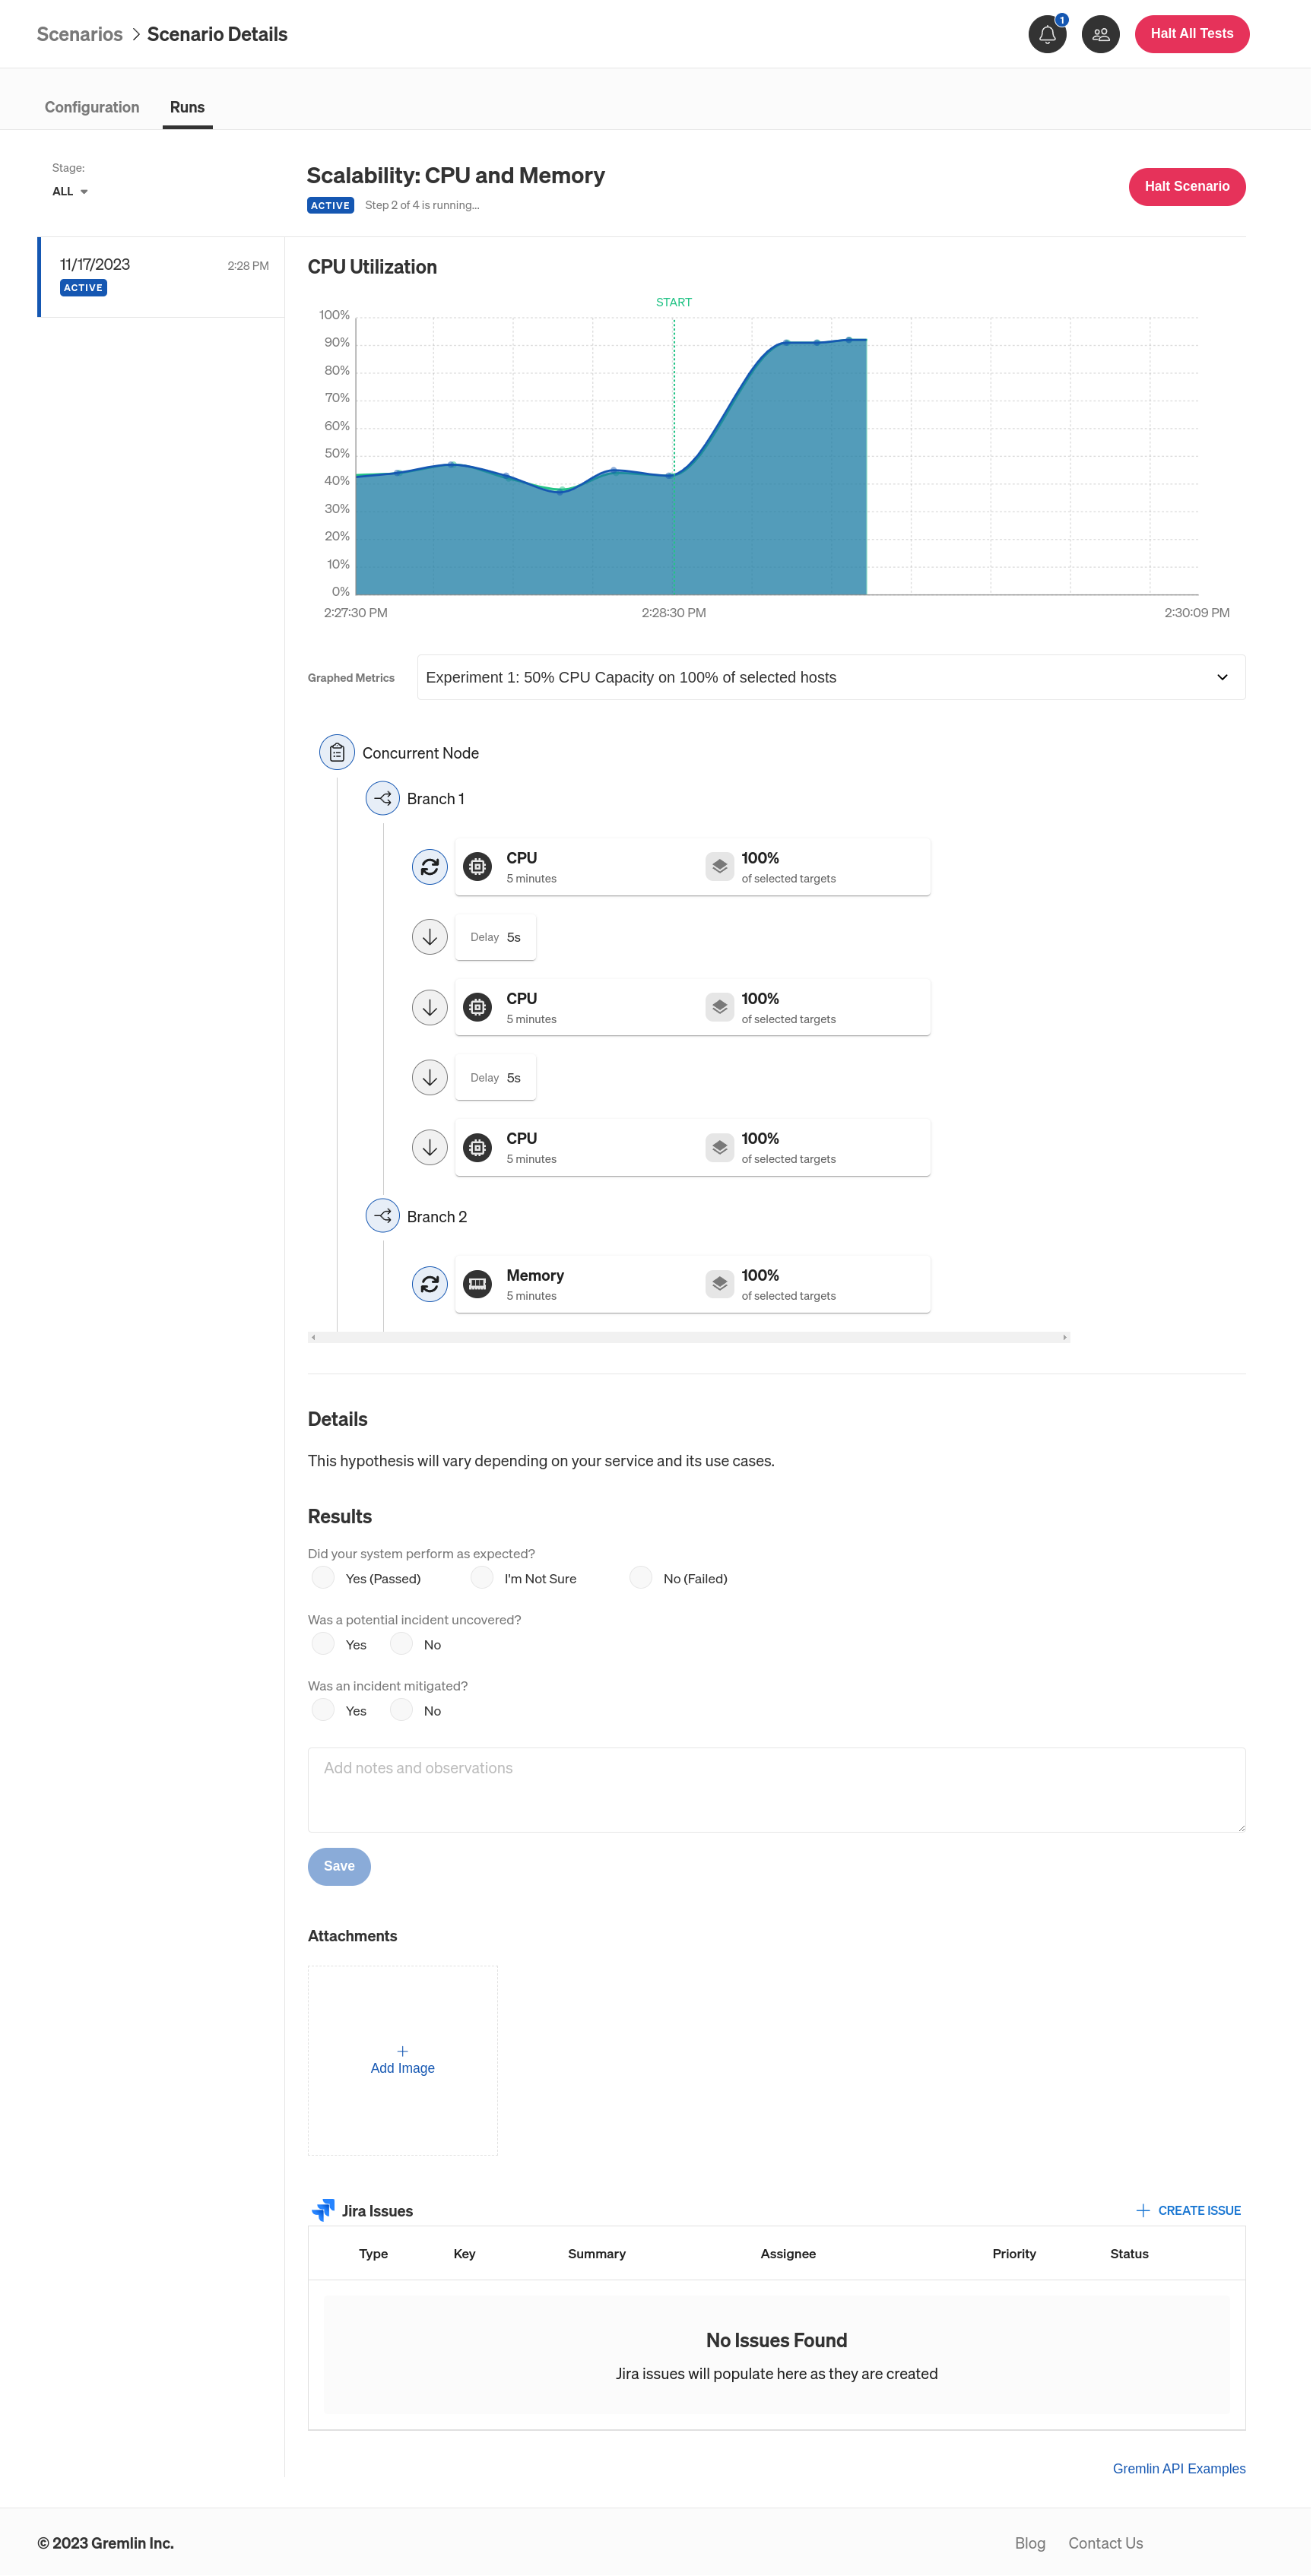
While the Scenario is starting, this would be a great time to pull up any metrics you have for the target system. Metrics will tell you how your system is responding to the test, and whether something unexpected happens, such as a system failure. If you don't have a monitoring or observability solution set up, even something like Windows Task Manager or htop will work. Gremlin also automatically graphs CPU usage during the experiment.
You'll know both experiments are running simultaneously by the animated icon next to their names:

While the Scenario is running, see how your system behaves. Does it run sluggishly? Are any applications or processes slowed down or terminated? Does the system start moving memory to swap space, and if so, how does that impact responsiveness?
If something unexpected or undesirable happens (like the system crashing), remember you can stop the Scenario by clicking the big red Halt Scenario or Halt All Tests buttons in the top-right corner of the web app.
Conclusion
Congratulations, you've successfully created a Scenario that runs two experiments side-by-side! Here are some additional steps you can take to get the most out of your Scenarios:
- Add a Health Check to automatically monitor the state of your target system(s) while the Scenario is running. A Health Check will also halt and revert the Scenario if it detects an unhealthy system.
- Add two more memory experiments to your Scenario to match the two remaining CPU experiments (add one that consumes 75% of total memory, and another that consumes 90%). Remember to add 5-second delays in between!
- Add more branches to test for different situations. What happens if you run a latency experiment alongside your CPU and memory experiments? What if you consumed two different amounts of CPU on two different cores? What if you ran a latency and packet loss experiment alongside your CPU and memory experiments?
Branches add a near-infinite number of possible Scenario configurations limited only by your creativity and use cases. If you need more inspiration, remember that we have over 30 additional pre-made Recommended Scenarios that you can use as a template. We also recommend thinking of any recent incidents or outages you or your team have experienced, and building a Scenario that replicates it.
Avoid downtime. Use Gremlin to turn failure into resilience.
Gremlin empowers you to proactively root out failure before it causes downtime. See how you can harness chaos to build resilient systems by requesting a demo of Gremlin.

.svg)

.svg)
.svg)


