How to use Detected Risks to quickly find reliability weaknesses

.svg)
.svg)

This tutorial will guide you through using Gremlin's Detected Risks feature from start to finish. This includes installing Gremlin on a Kubernetes cluster, deploying an example application to the cluster, setting up your first service in Gremlin, and seeing your first automatically detected reliability risks.
These are the actions you'll perform during this guide:
- Deploy an application to a Kubernetes cluster.
- Download the Agent configuration file from Gremlin.
- Install the Gremlin Helm chart onto a Kubernetes cluster.
- Review your Detected Risks.
Overview
Detected Risks are high-priority reliability concerns that Gremlin automatically identified in your environment. These risks can include misconfigurations, bad default values, or reliability anti-patterns. Gremlin prioritizes these risks based on severity and impact for each of your services. This gives you near-instantaneous feedback on risks and action items to improve the reliability and stability of your services.
This video shows how Detected Risks appears in the Gremlin web app:
Prerequisites
Before you begin, make sure you have:
- A Kubernetes cluster.
- <span class="code-class-custom">kubectl</span> (or a similar tool for administering Kubernetes) and Helm.
- A Gremlin account (log into an existing account or sign up for a free trial).
Step 1: Deploy an application to Kubernetes
First, we need to deploy an application to our Kubernetes cluster for Gremlin to evaluate. We'll use the Bank of Anthos, a fictional retail banking application. If you already have an application deployed, feel free to use it instead.
For Gremlin to detect risks, we need to define each of the services in our application in Gremlin. A service is any discrete unit of functionality within our application. In the Bank of Anthos, this includes the web frontend, transaction ledger, balance reader, and other Kubernetes Deployments.
We can automate this process by adding an annotation to our Kubernetes manifests. We can do this by either downloading and modifying the manifest, or if it's already running on our cluster, annotate the running application. Modifying the manifest is the recommended method, since it guarantees the annotation will persist across deployments. We just need to add the following YAML to each Deployment, where <span class="code-class-custom">my-service</span> is the name that Gremlin will show for the service. We recommend making this the same as the Kubernetes resource name:
If you'd rather annotate a resource that's already deployed, you can use <span class="code-class-custom">kubectl annotate</span>:
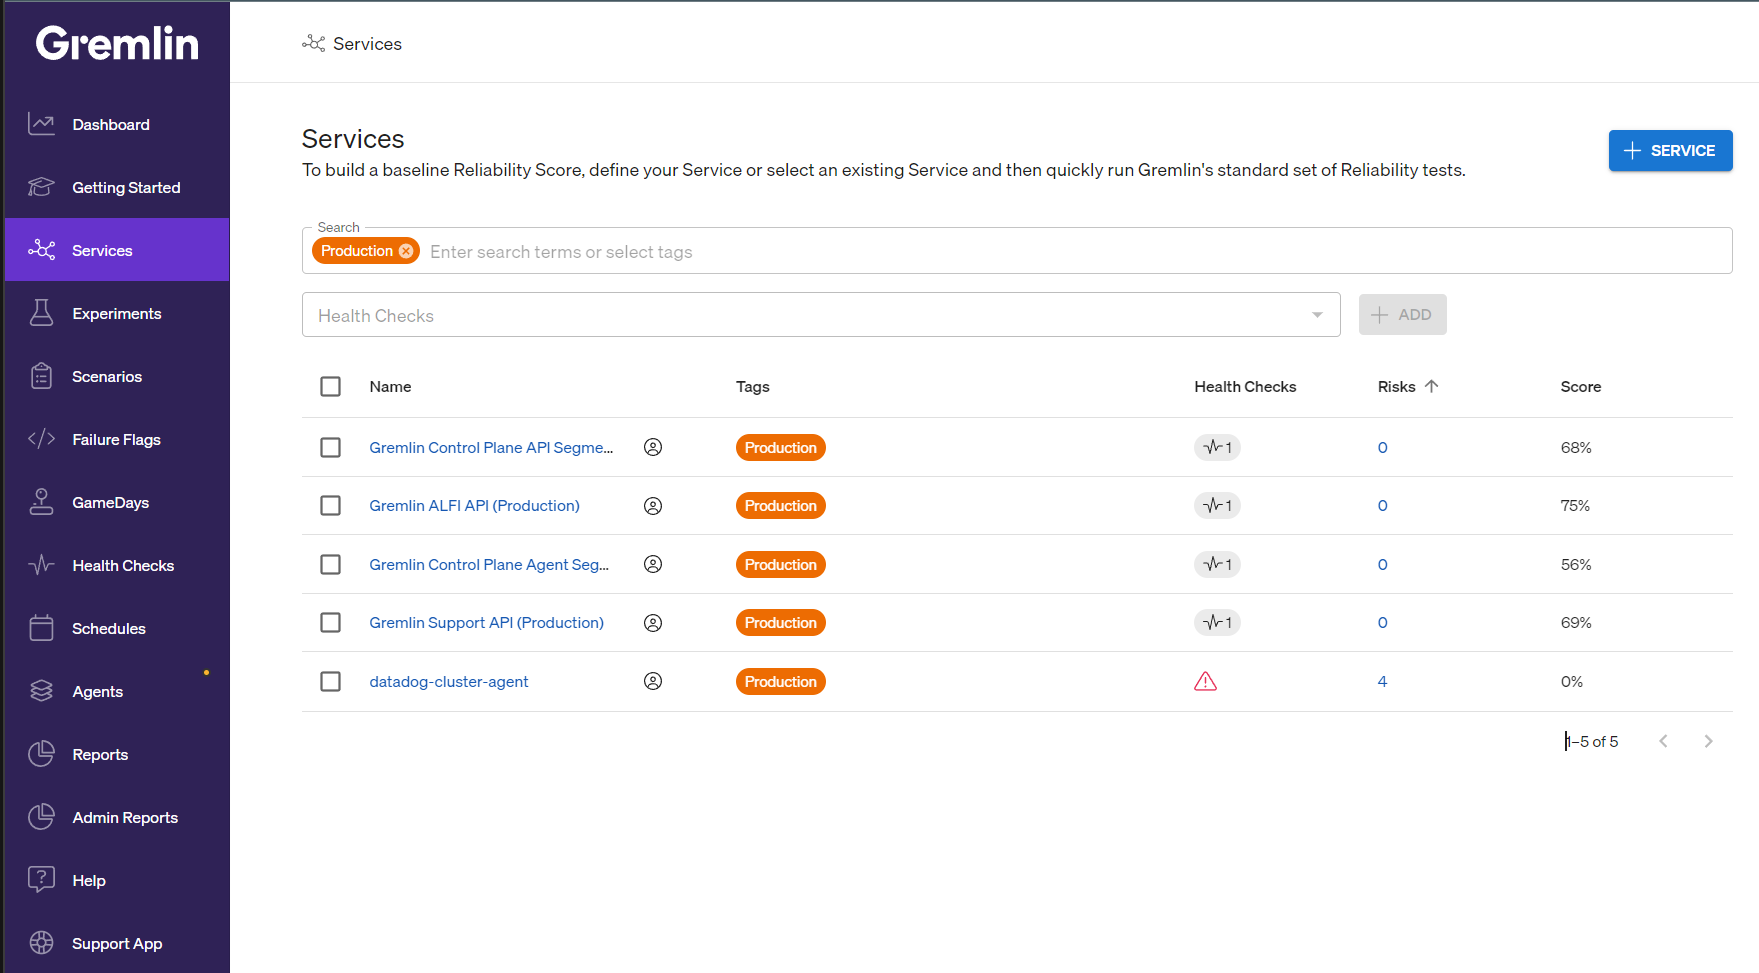
In a few minutes, Gremlin will detect your services and list them in the Services list:
Step 2: Get your Gremlin team ID and secret
Before you can deploy the Gremlin agent to your cluster, you'll need authentication details. The recommended way to do this is using certificate-based authentication.
To download your Gremlin certificate files:
- Log into the Gremlin web app at app.gremlin.com.
- Access your team settings by clicking on the user icon in the top-right corner and selecting Team Settings.
- Click on the Configuration tab.
- Next to Certificates, click the Download button if you already have certificates generated, or Create New if you don't. Save this file to your local computer. Keep this page open, as you'll need to come back to it to retrieve your Team ID.
Step 3: Install the Gremlin Helm chart
The Gremlin Helm chart deploys a DaemonSet that runs on your Kubernetes cluster. It performs several key functions:
- Orchestrates experiments on your systems.
- Detects Kubernetes resources.
- Analyzes your Kubernetes deployment configurations for risks.
If you haven't already installed Helm or kubectl, do so now. Then, open a terminal and run the following commands. This adds the Gremlin repository to your Helm installation and creates a <span class="code-class-custom">gremlin</span> namespace on your cluster.
Next, format the following command by entering your Gremlin team ID, your Gremlin cluster ID (the name you want the cluster to appear as in the Gremlin UI), and the paths to the Gremlin certificate file and Gremlin key file that you downloaded.
Run this command to create the secret, then run the following command to deploy the Helm chart:
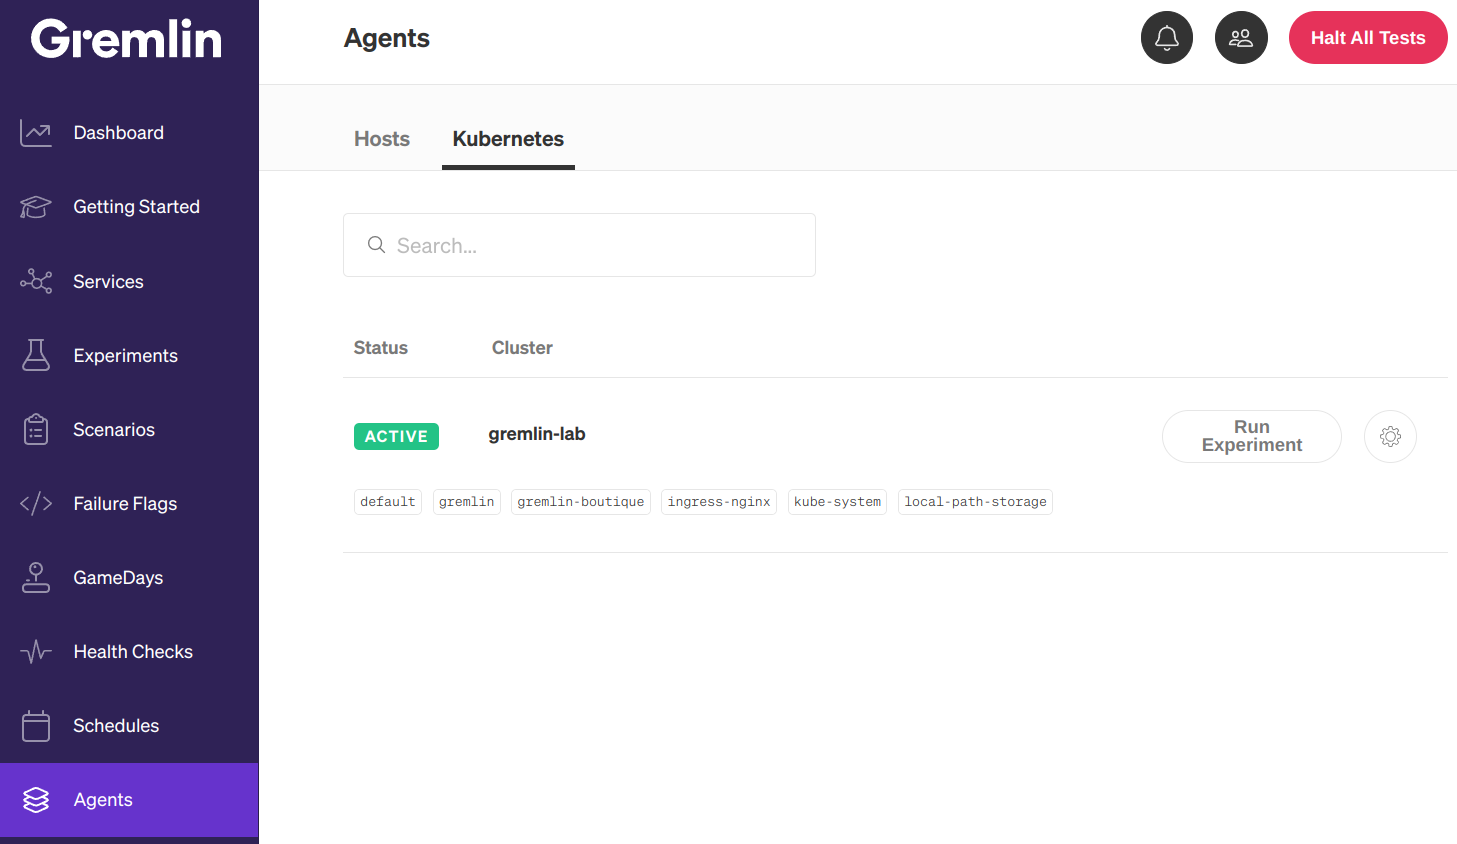
Your Kubernetes cluster will appear in the Gremlin web UI on the Kubernetes page. If the cluster doesn't appear after 15 minutes, or if you have trouble authenticating, check our Authentication FAQ for possible causes and solutions.
Step 4: Review your detected risks
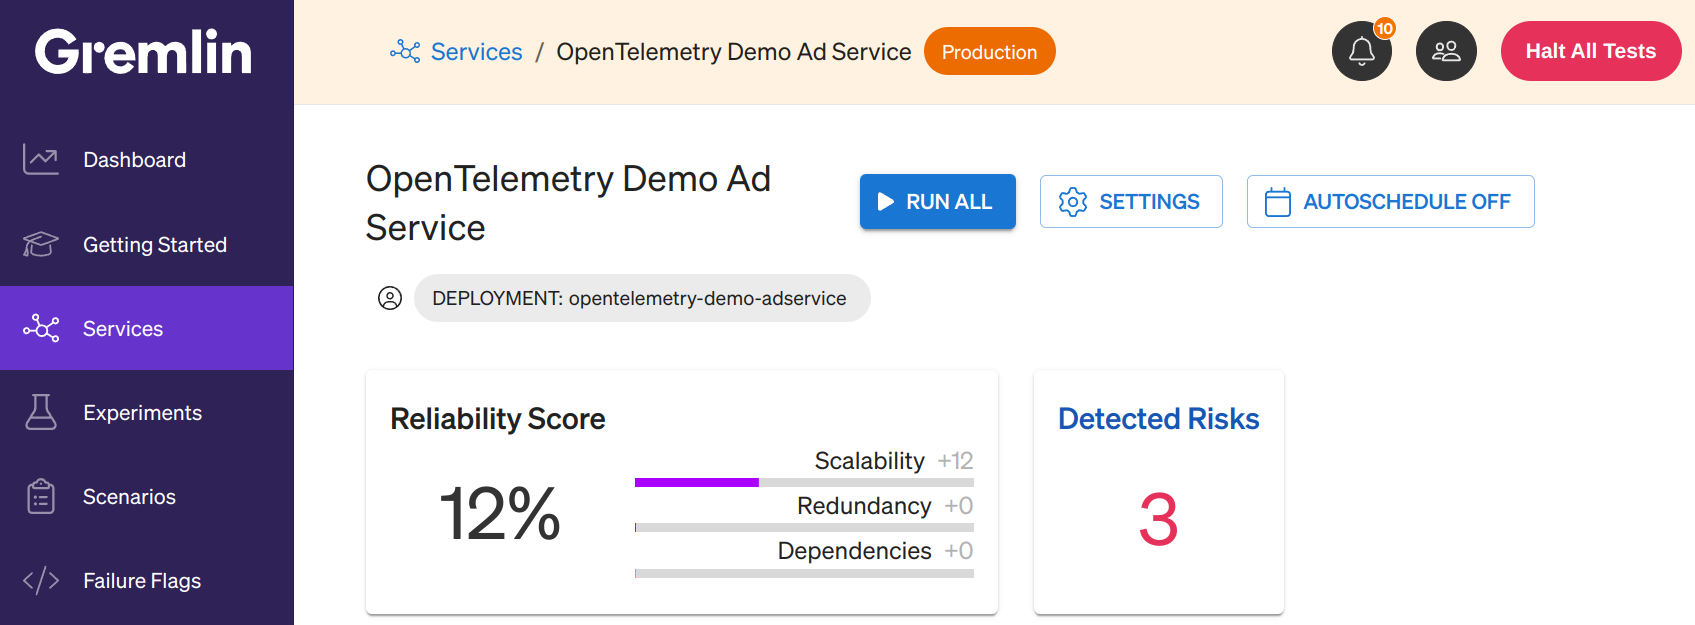
After your cluster connects and Gremlin detects your services, you can review them on the Services page. Next to each Service, you'll see a Risks column with a number. This is the number of risks that Gremlin detected automatically. If a risk isn't relevant to the service, the number will be replaced with "n/a":
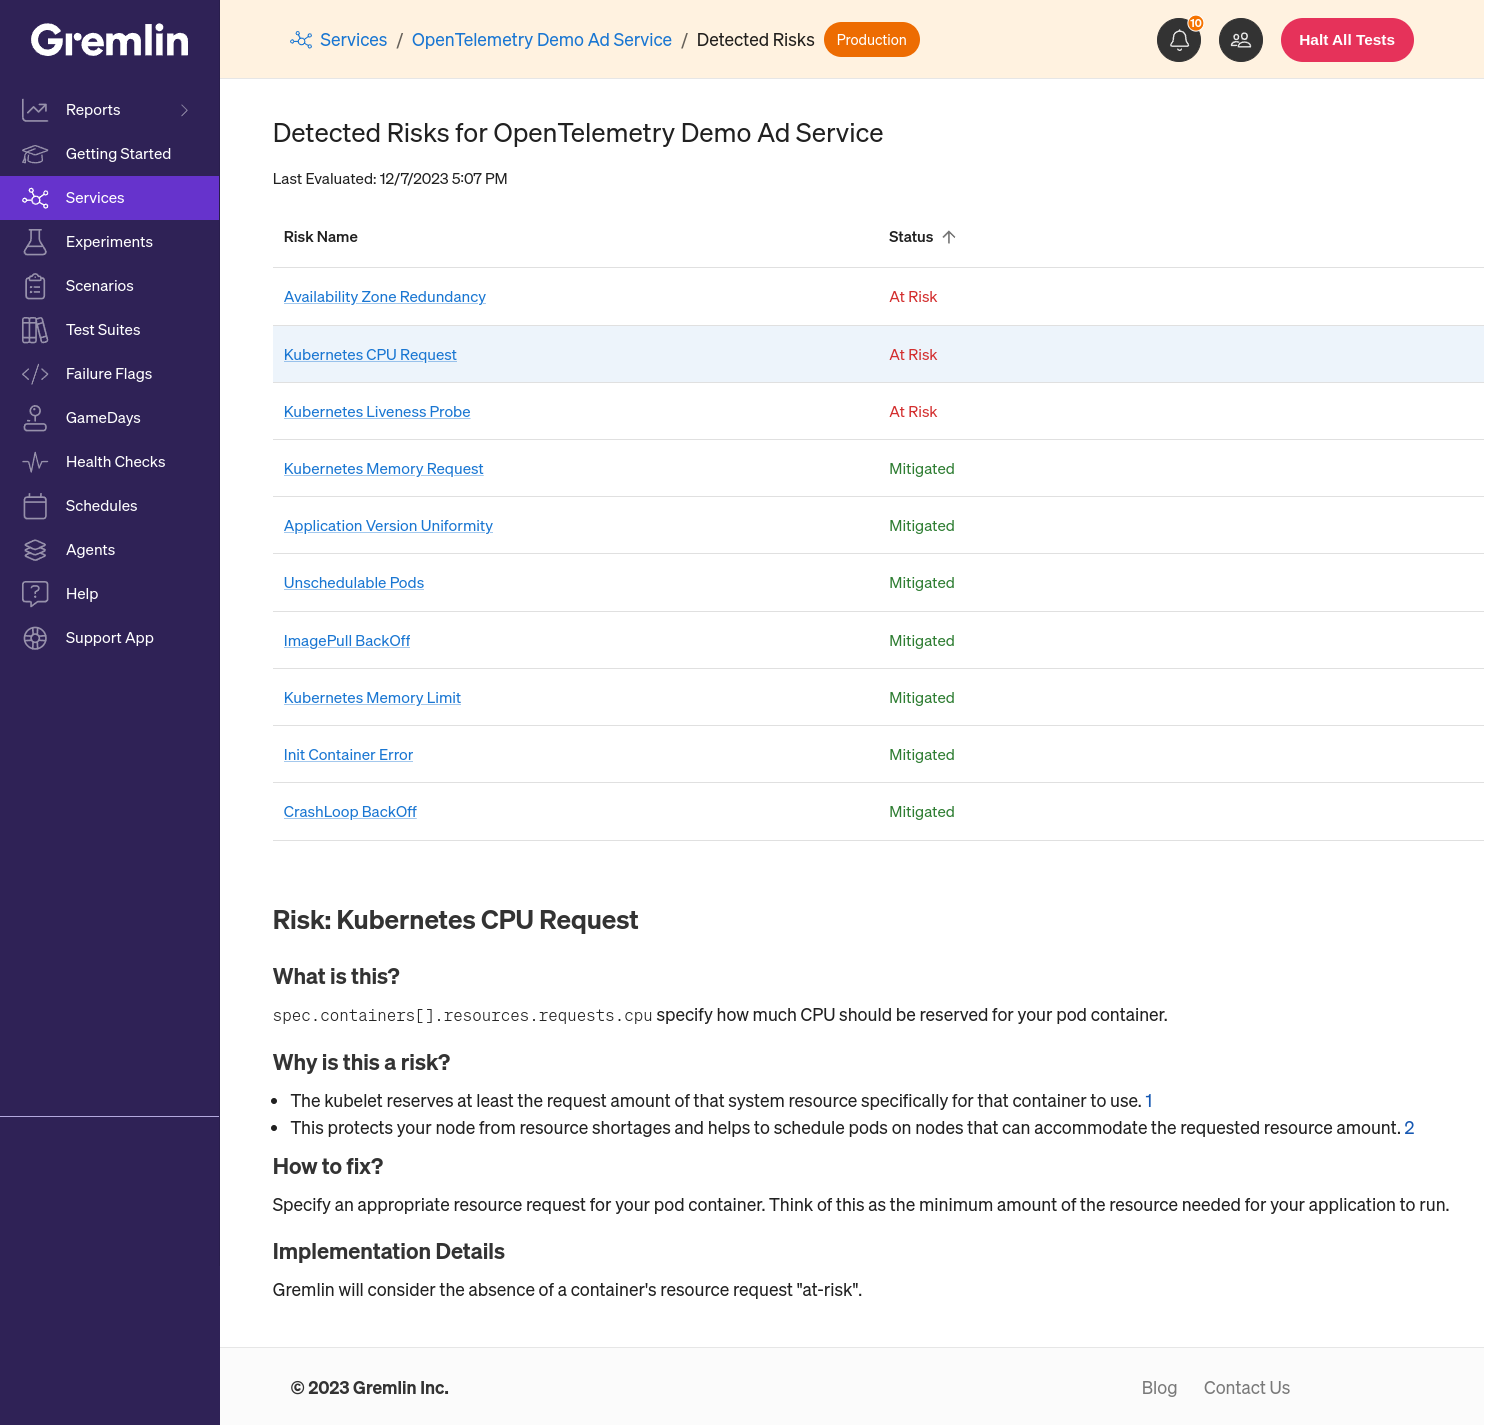
Click on this number to open the Detected Risks page for that service. Here you'll see a table listing each risk and its status. A risk can have one of three statuses:
- At-risk: This risk is currently present in your systems and hasn't been addressed.
- Mitigated: This risk has been fixed since it was last detected.
- N/A: This risk has been fixed since it was last detected, or was never at risk.
Click on any of these risks to see additional information about the risk and guidance on how to fix it.
Next steps
Congratulations on taking this step in your reliability journey! Now that you've added a service and reviewed your Detected Risks, see if you can change all of your "at-risks" to "mitigated." Once you deploy a possible fix to your Kubernetes cluster, Gremlin will automatically re-scan and report any changes to your risks.
Once your Detected Risks are green across the board, consider adding additional services, running reliability tests, or running chaos experiments. These will give you even more insight into how resilient your services are.
You can also check out the following links to learn more about how to use Gremlin:
Related

Avoid downtime. Use Gremlin to turn failure into resilience.
Gremlin empowers you to proactively root out failure before it causes downtime. See how you can harness chaos to build resilient systems by requesting a demo of Gremlin.GET STARTED

.svg)